scATAC-seq_v3 User Manual
scATAC-seq_v3 User Manual
1. Scope of application
scATAC-seq_v3 can handle the high-throughput sequencing data analysis for the following kits:
DNBelab C Series High-throughput Single-cell ATAC Library Preparation set.
2. Product Introduction
2.1 Analysis Flowchart
The scATAC-seq_v3 analysis workflow is an automated analysis process developed based on the DCS Cloud, which includes reference genome alignment, deconvolution (cell identification and merging), quality control, peak calling, downstream analysis, and report generation:

2.1.1 Reference Genome Alignment
Use chromap (v0.2.3_r407) to align the input FASTQ files with the reference genome file.
2.1.2 Deconvolution
Using d2c (v1.4.4) to capture complete cells with beads, and then merge the beads based on the similarity of fragments within the beads.
2.1.3 Quality Control
Perform fragment distribution statistics and TSS region enrichment for quality control.
2.1.4 Peak Calling
Use macs2 (v2.2.7.1) to identify regions enriched with aligned reads obtained from sequencing in the genome. for ATAC, peaks are regions of open chromatin, and generate a peak-cell matrix.
2.1.5 Downstream Analysis
Perform cell quality control based on the generated matrix, and conduct downstream analyses such as dimensionality reduction, clustering, and cell type annotation.
2.1.6 Report Output
Comprehensive analysis results, organized and summarized into an HTML report.
3. User Manual
The scATAC-seq_v3 analysis workflow is managed through the DCS Cloud platform for sample input and report output throughout the entire process. The following provides a detailed guide on how to use the scATAC-seq_v3 analysis workflow based on the DCS Cloud platform.
3.1 Guide Overview
3.1.1 Overview
This chapter introduces how to use scATAC-seq_v3 analysis workflow for analysis. Before using, please read and understand the content carefully to ensure correct usage of the scATAC-seq _v3 analysis workflow.
3.2 Usage Scenario 1: Manual Submission
The operation includes four steps: upload data, construct reference genome (optional), parameter settings, start analysis. After completing the parameter settings, run the task, when the client sees the task status as completed , it indicates that the task is complete, and the report section can be viewed (see section 3.4 for details).
3.2.1 Step One: Upload Data
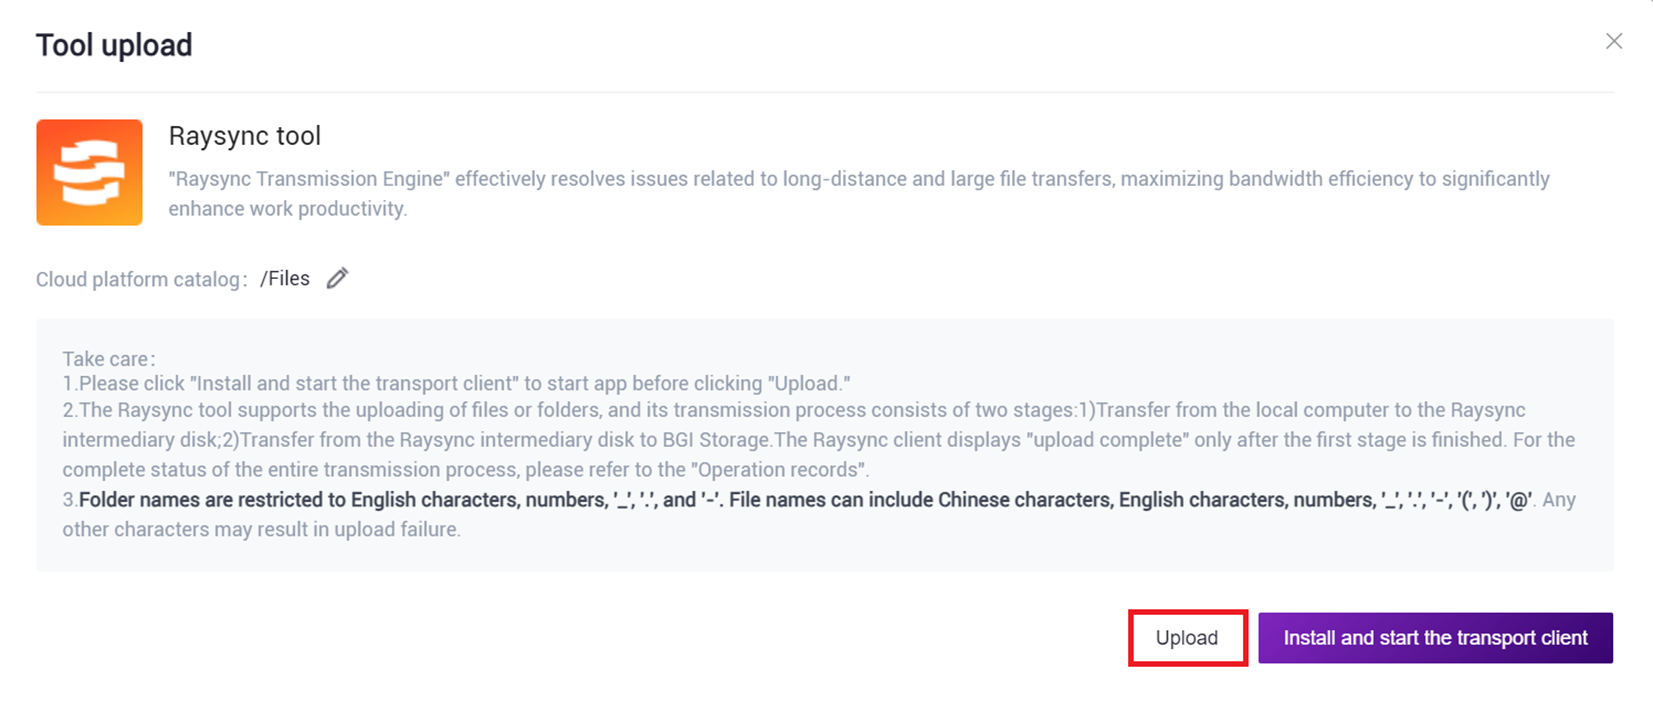
- Click on the navigation bar [Data] to enter the Data Management page, navigate to the target folder, and click the upper right corner [+Add files]-[Tool upload ] to upload data (Figure 3-1 ).

- Click [Upload] to browse and select the required file (Figure 3-2), after the upload is complete, the file will be displayed in the target folder (if this is the first upload, you need to click [Install and start the transport client] to install the required tools).
3.2.2 Step Two: Build Reference Genome (Optional)
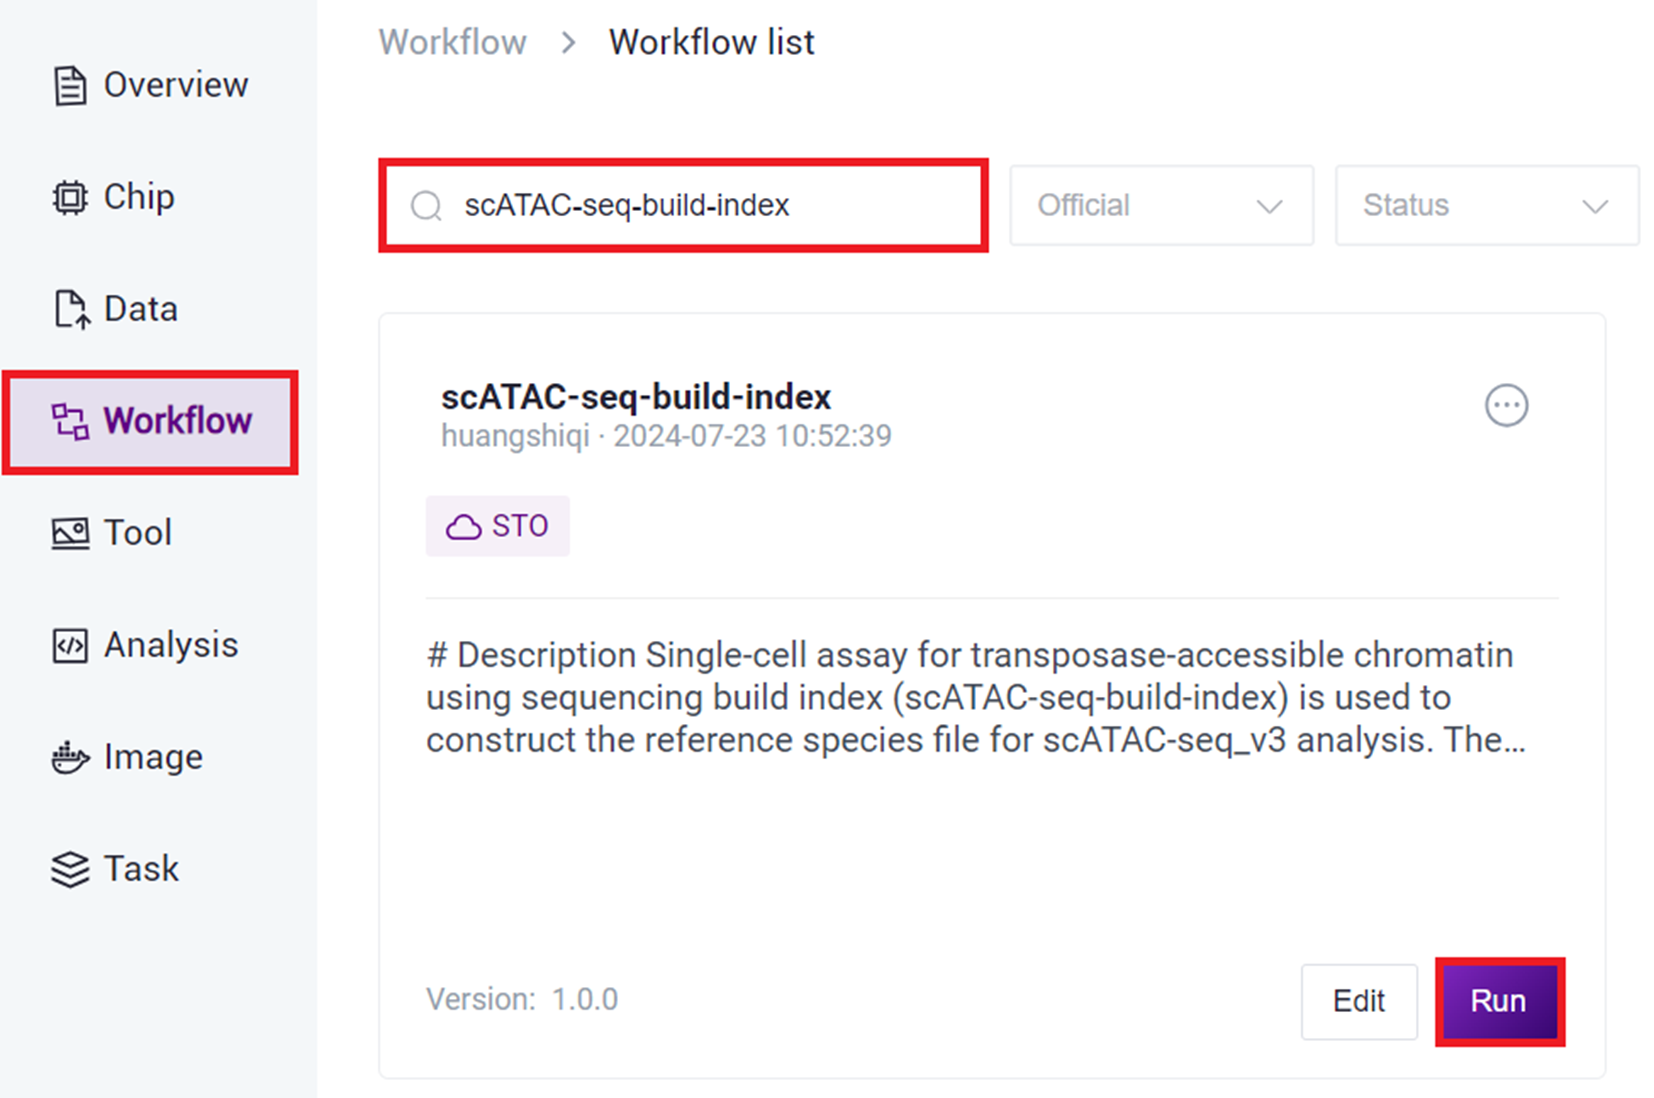
- Click on the navigation bar [Workflow] to enter the Workflow Analysis page, enter scATAC-seq-build-index in the search box, and click [Run].
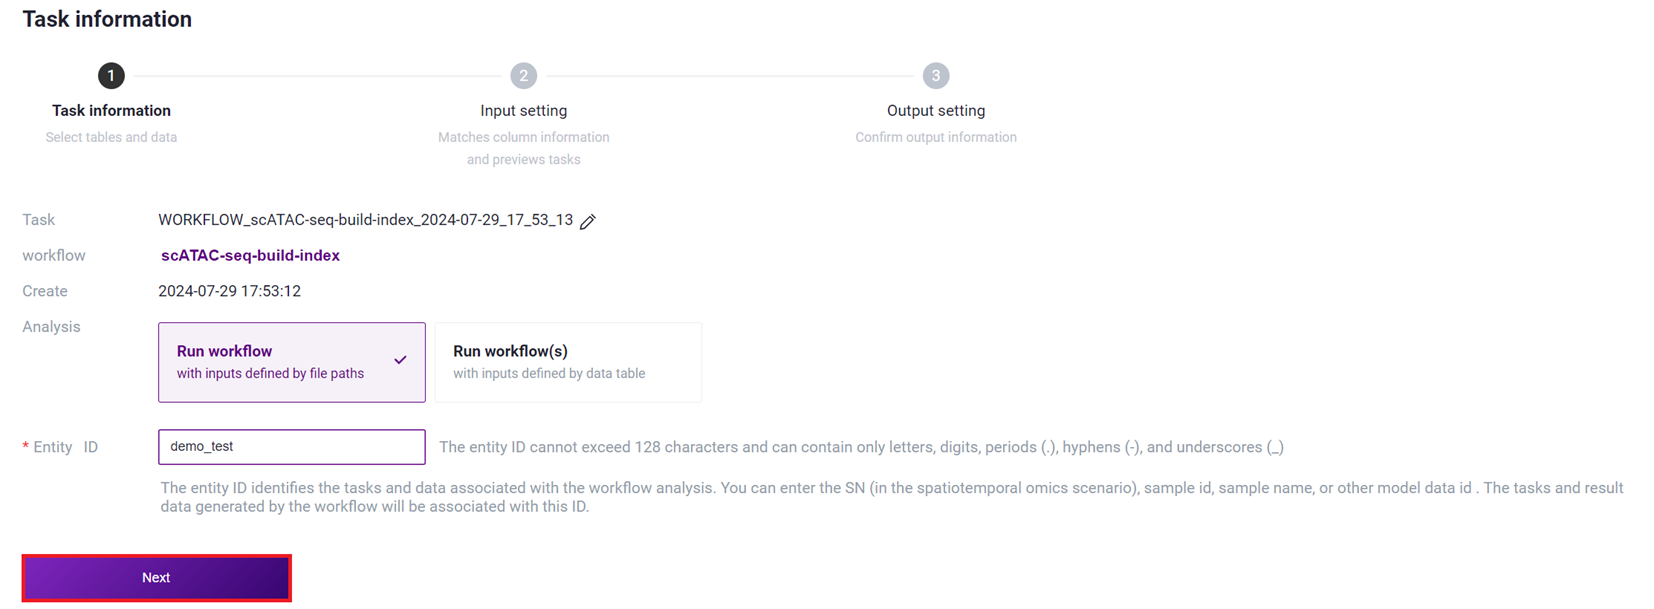
- Select Run workflow, enter Entity ID, and click [Next].
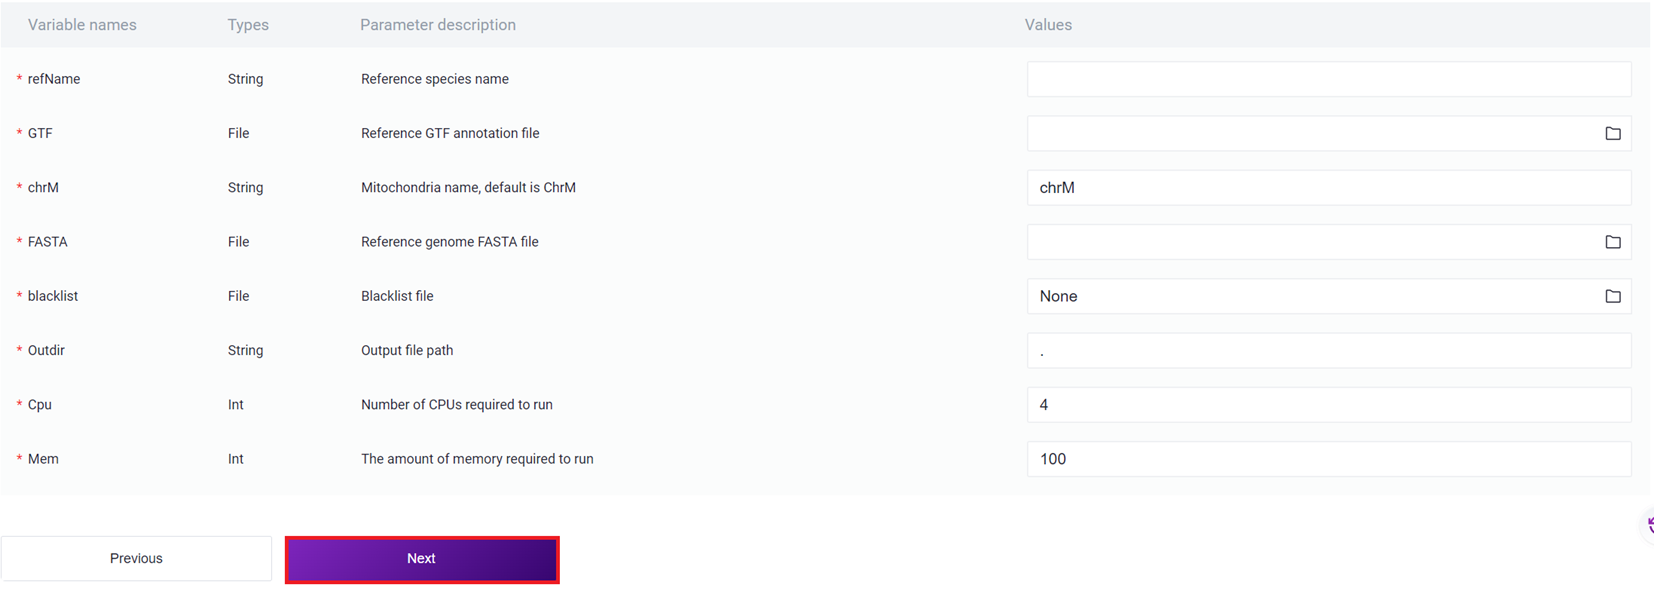
- Enter the reference genome information, and click [Next].
Note
Parameter Description for Entering Reference Genome Information :
refName: Species name of the reference genome ;
GTF: Genome annotation GTF file ;
chrM: Mitochondrial name ;
FASTA: Genome FASTA file;
blacklist: Blacklist file, fill in None if not available;
Outdir: Output file path;
Cpu: Required CPU for operation;
Mem: Required memory for operation.
- Click [Run] to start the analysis.
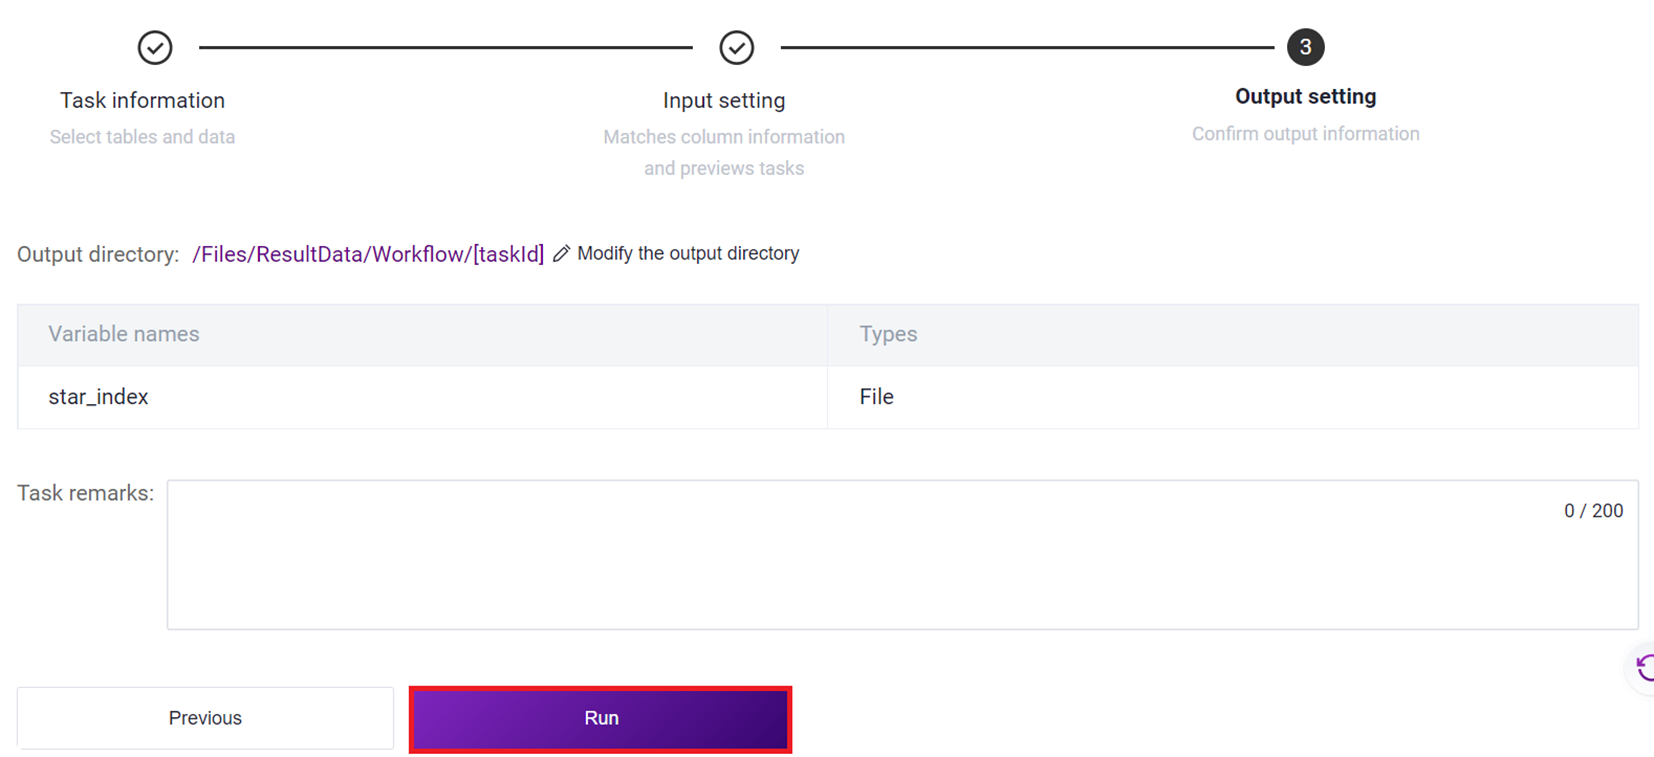
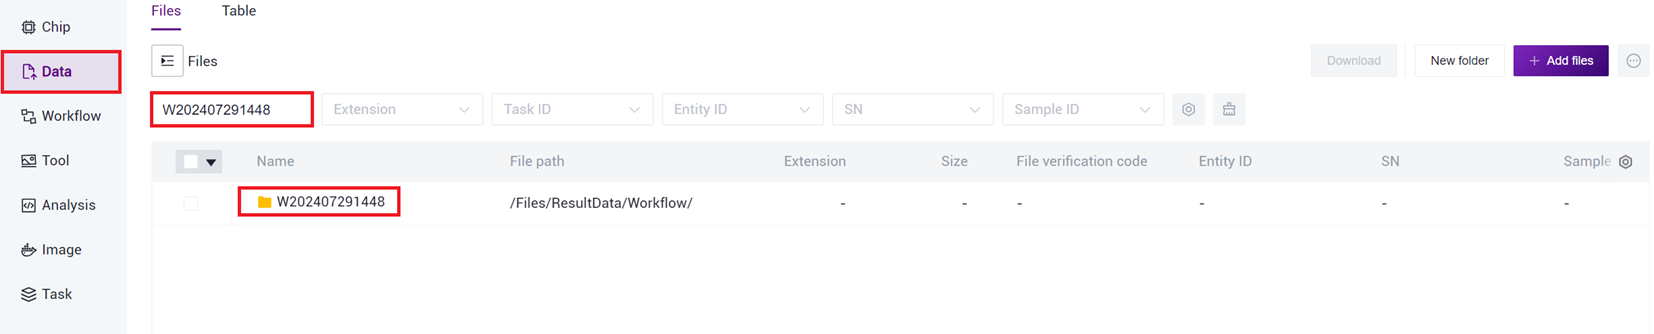
- After the task is completed, the Status will display as completed. Copy the Task ID (Figure 3-7 ), click on the navigation bar [Data], and enter the Task ID to search (Figure 3-8 ), where the scATAC_ref directory will be used as the reference genome file for the scATAC-seq _v3 analysis (Figure 3-9 ).


3.2.3 Step Three: Parameter settings
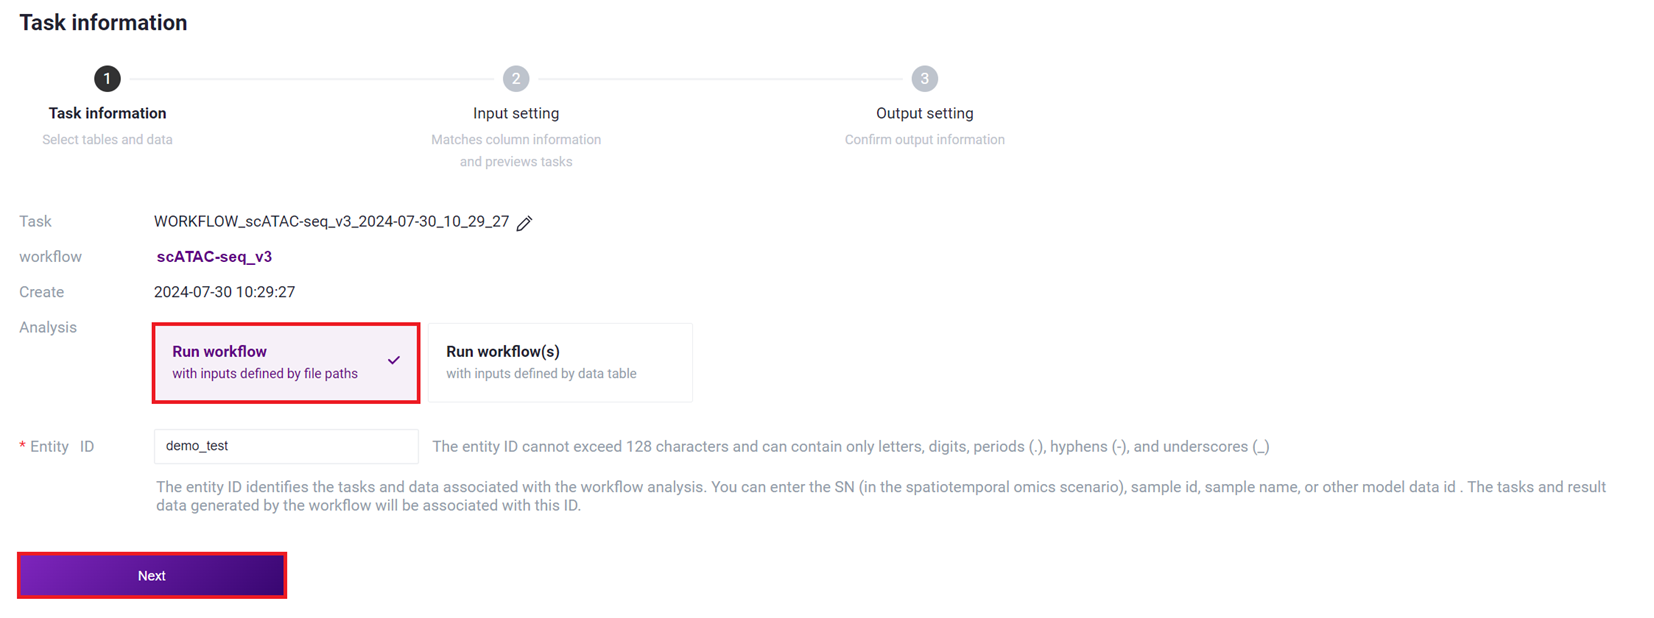
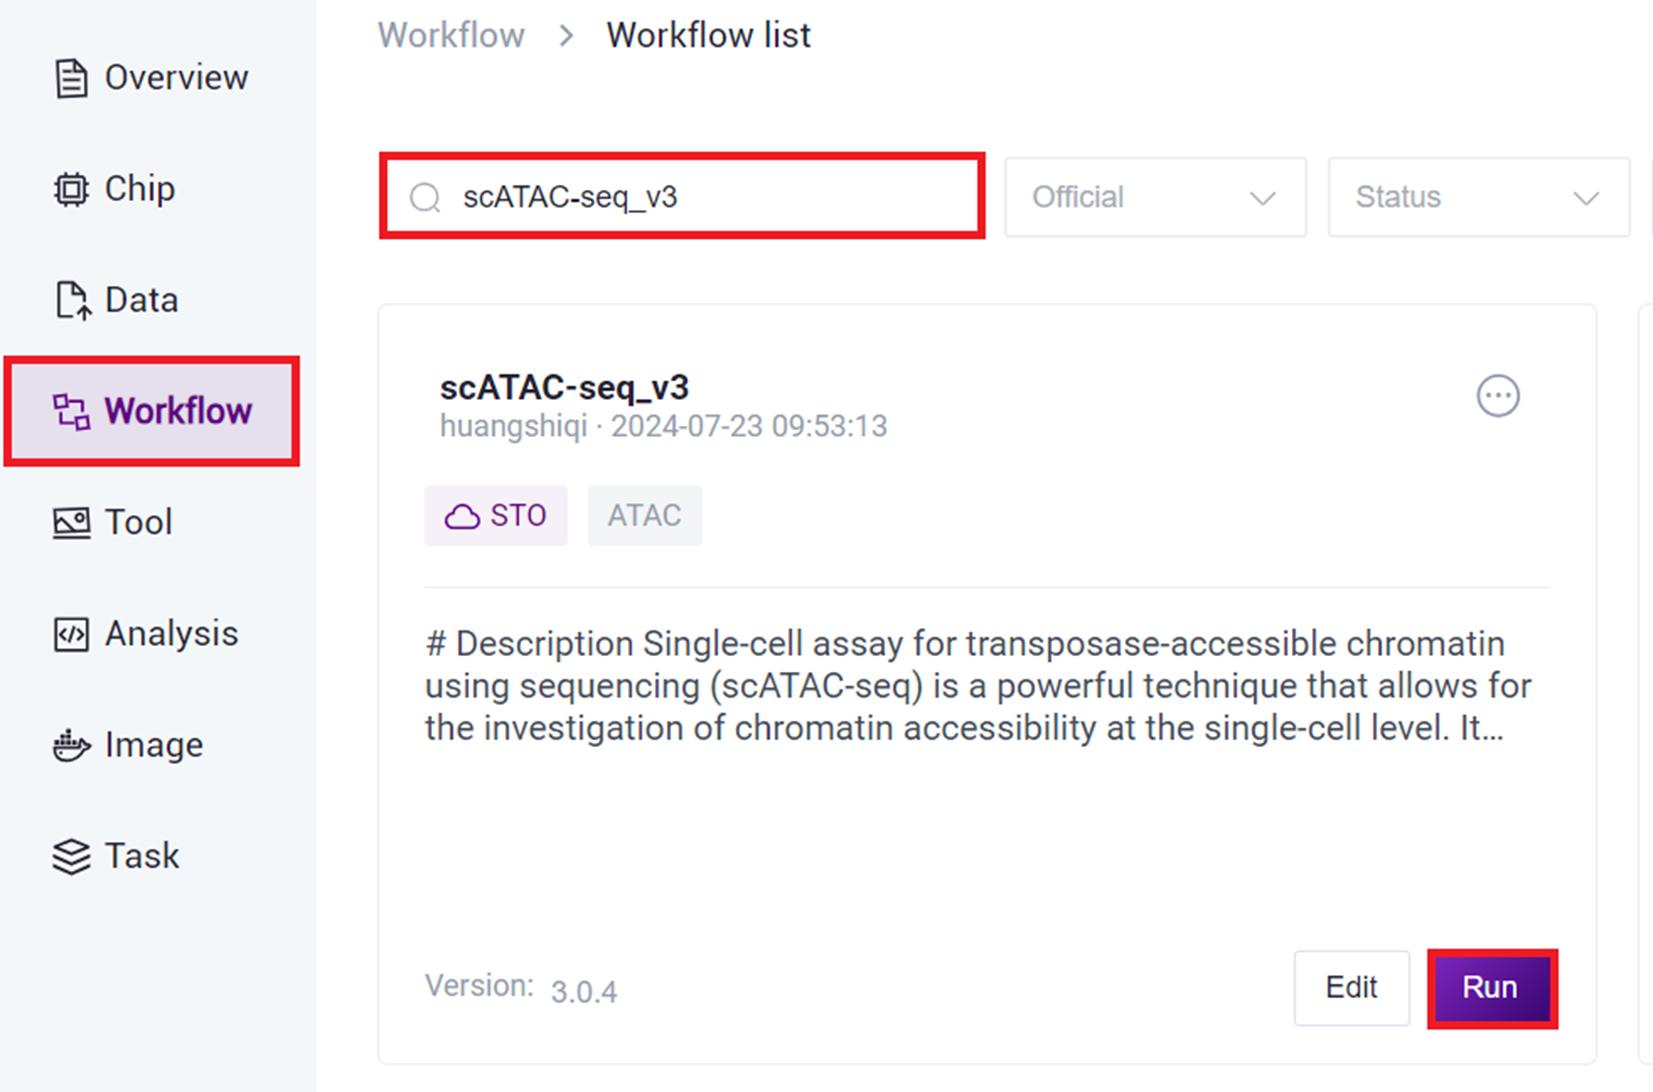
- Click on the navigation bar [Workflow] to enter the process analysis page, enter scATAC-seq_v3 in the search box, and click [Run].

- Select Run workflow, enter Entity ID, and click [Next].
- Enter sample information, and after completion, click [Next] .

Note
Sample Information Entry Parameter Description :
Data: FASTQ format R1 and R2 end sequences, note that for each pair of FASTQ, select R1 first, then select R2;
Outdir: Output file path;
SampleID: Sample Name, defaults to being consistent with Entity ID ;
readStructure (optional): Sequencing method, defaults to newT1 ;
OutBam: Whether to output bam file, defaults to false;
model: Whether it is a model organism (mouse / human), defaults to false;
ForceFrag (optional): Minimum number of fragments for merging duplicate data's dual fragment threshold;
refDir: Reference genome file, if constructed independently in step two (3.2.2 Build Reference Genome), select the scATAC_ref file in the Task ID folder;
BlackList: Blacklist file, defaults to None;
chrMT: Mitochondrial name, defaults to chrM;
genomeSize: Genome size, consistent with the value of genome size in the reference genome construction result file ref. json ;
cpp: Required CPU size for operation, default value is 4;
mem: Required memory for operation, default value is 20 ;
Species: Name of the species, if the value of model is true, input mm10 or hg38.
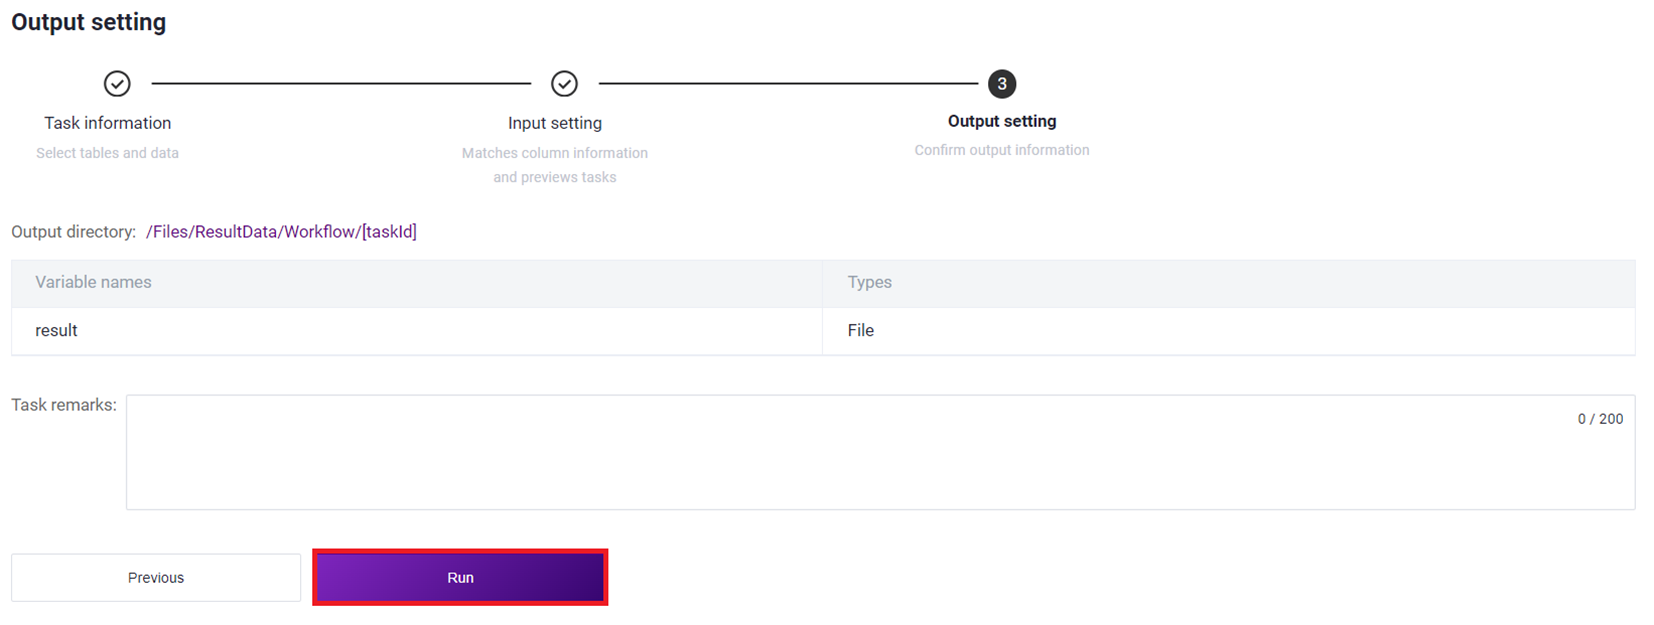
3.2.4 Step Four: Start Analysis
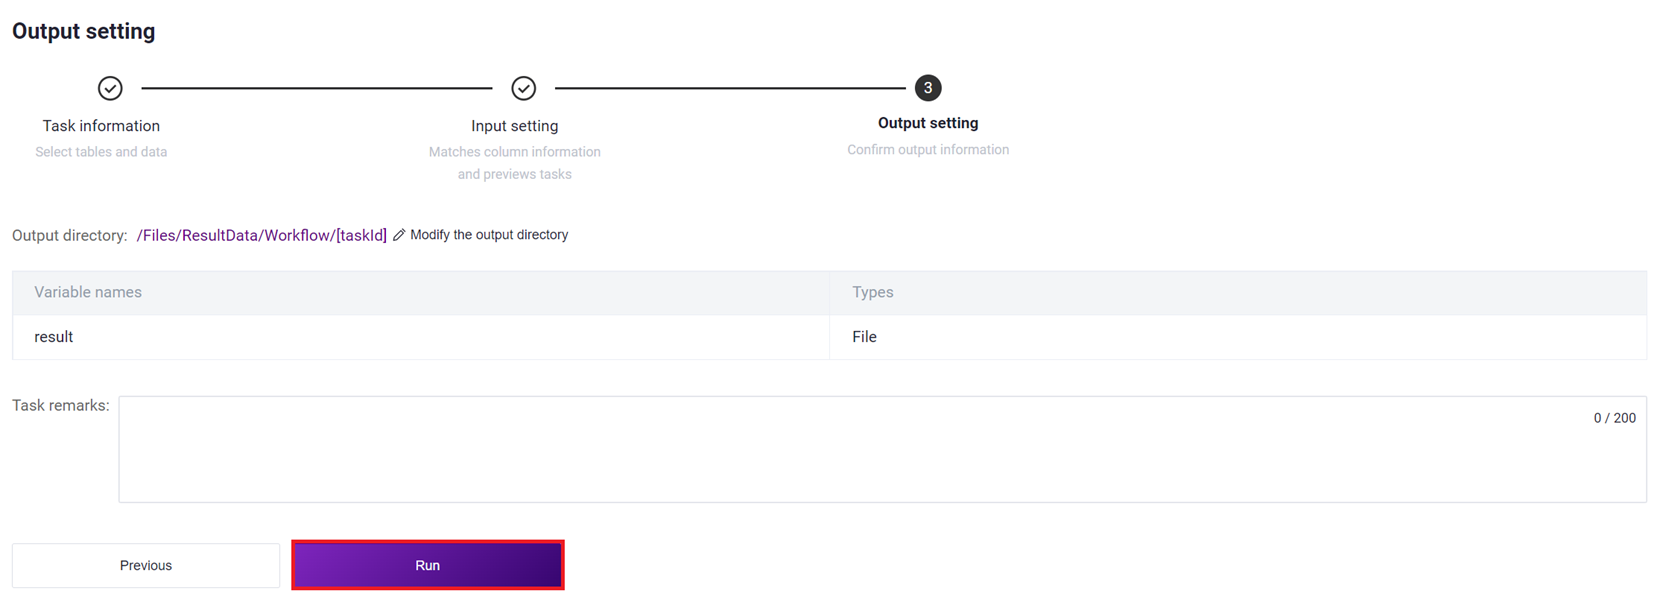
Click [Run] to start the analysis.
3.3 Usage Scenario 2: Table Submission
The operation includes five steps: upload data, build reference genome (optional), download sample template, fill in and import sample template, start analysis. After completing the sample template import, tasks can be run in batches, when the client sees the task status as completed , it indicates that the task is complete, and the report section can be viewed (see Section 3.4 for details).
3.3.1 Step One: Upload Data
Consistent with Step One of Use Case One (Manual Submission) (see 3.2.1 Step One: Upload Data).
3.3.2 Step Two: Construct Reference Genome (Optional)
Consistent with Step Two of Use Case One (Manual Submission) (see 3.2.2 Step Two: Construct Reference Genome).
3.3.3 Step Three: Sample Information Entry Table Download
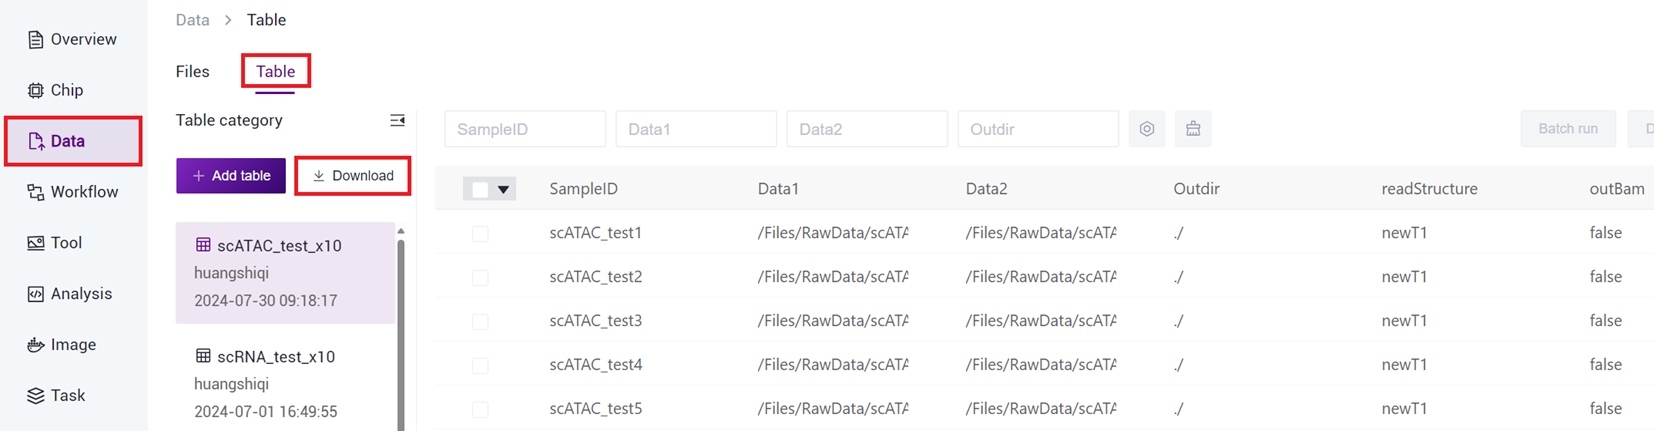
- Click on the Navigation Bar [Data], select [Table] -[Download] (as shown in Figure 3-14 ), click [Data model template]****, and select scATAC-seq_v3 template for download.
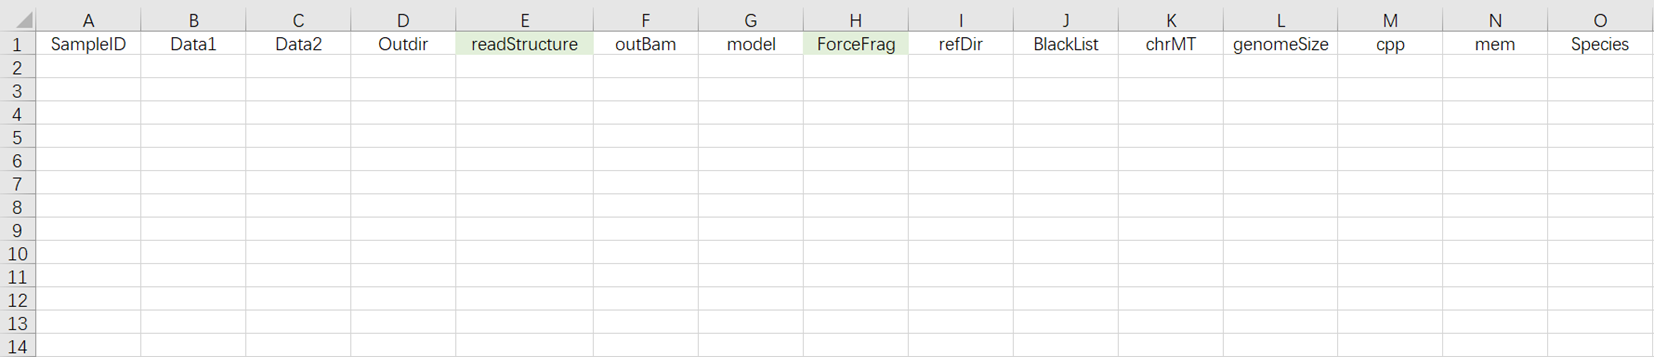
- After opening scATAC-seq_v3 Sample Template Excel as shown in Figure 3-15.
3.3.4 Step Four: Import Sample Information
- Under this usage scenario, the sample import table must fill in the work table (Figure 3-15 ). This scenario indicates that for samples with completed sequencing data, after importing the table, it directly enters the analysis.
Note
Excel Notes:
[ 1 ] The import file path must already exist on the cloud platform.
[ 2 ] In the template, all input fields except readStructure and ForceFrag are required. In the imported data, required fields must not be empty.
[ 3 ] The SampleID in Excel must be unique.
[ 4 ] Cells in Excel cannot be merged, and cell contents must not have leading or trailing spaces or special characters.
[5 ] Analysis Sample Entry (Figure 3-16):
Data: R1 and R 2 end sequences in FASTQ format. Note that for each pair of FASTQ files, you must first fill in the absolute path for R1 (at Data 1 ), and then fill in the absolute path for R2 (at Data 2 );
Outdir: Output file path;
SampleID: Sample Name, defaults to being consistent with Entity ID ;
readStructure (optional): Sequencing method, defaults to newT 1 ;
OutBam: Whether to output bam file, defaults to false;
model: Whether it is a model organism (mouse / human), defaults to false;
ForceFrag (optional): Minimum number of fragments for merging duplicate data's dual fragment threshold;
refDir: Reference genome files. If constructed independently in step two (3.3.2 Constructing Reference Genome), select the scATAC _ref folder within the Task ID folder;
BlackList: Blacklist file, defaults to None;
chrMT: Mitochondrial name, defaults to chrM;
genomeSize: Genome size, which should match the genomesize value in the result file ref. json from the reference genome construction;
cpp: Required CPU size for operation, default value is 4;
mem: Required memory size for operation, default value is 20 ;
Species: Name of the species, if the value of model is true, input mm10 or hg38.

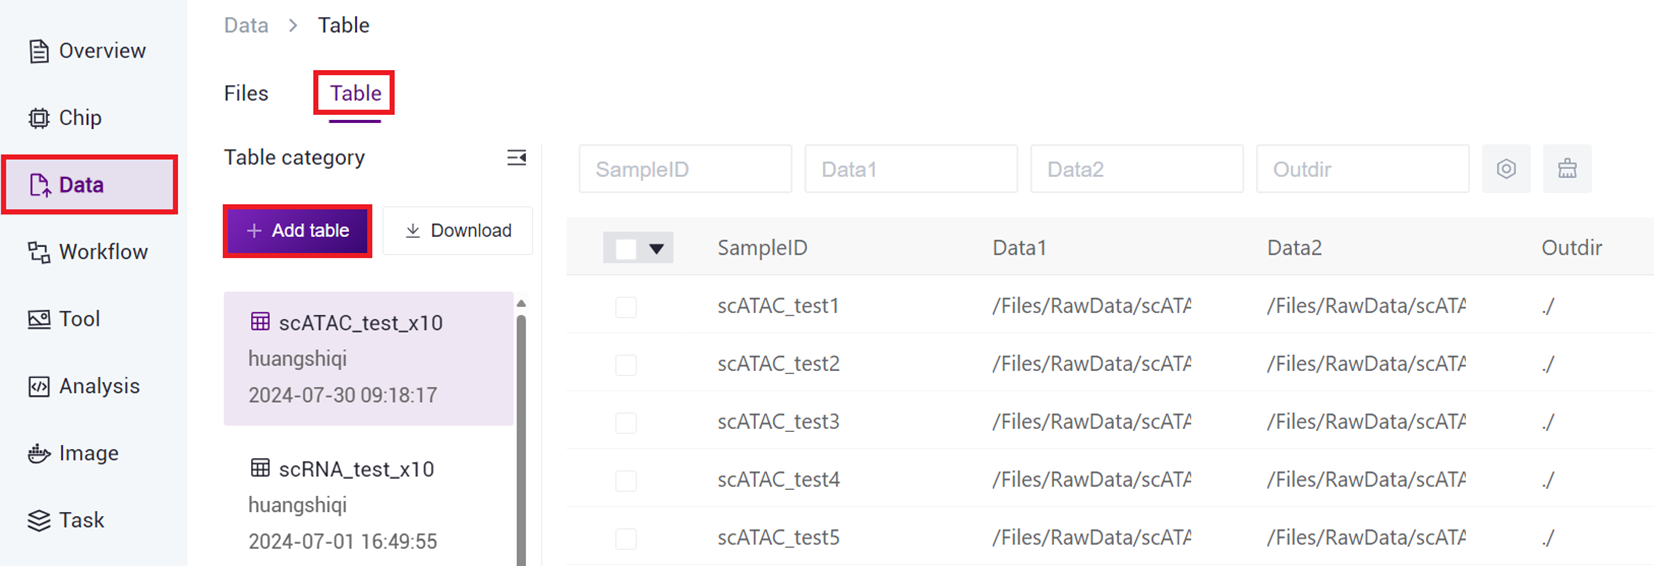
- After configuring the sample template analysis sample entry work table, return to [Data] interface, click [Table] - [+ Add table].
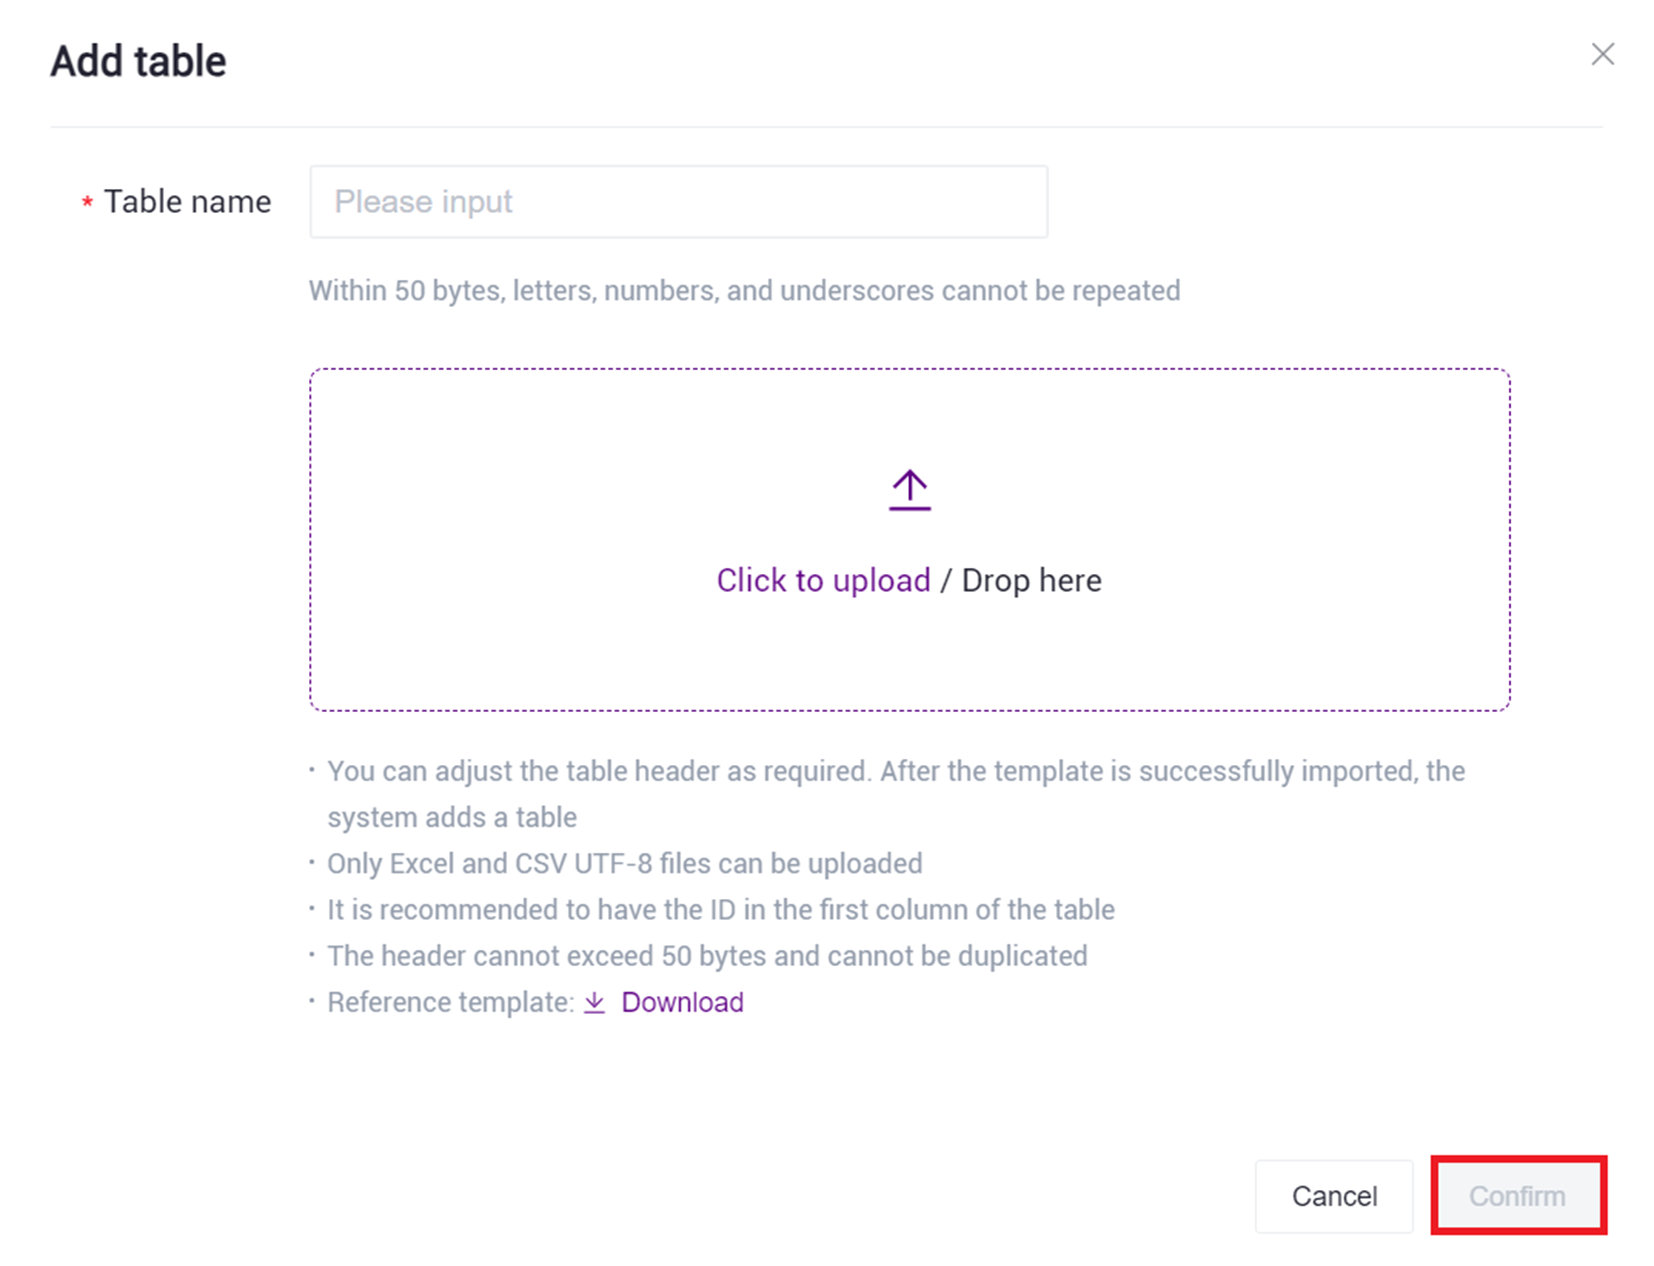
- Click [Click to upload/Drop here] browse and select the completed sample information table, then click [confirm] (Figure 3-18), after the upload is complete, the file will be displayed in the target folder.
- Click the navigation bar [ Workflow ] to enter the workflow analysis page, enter scATAC-seq_v3 in the search box, click [ Run ].
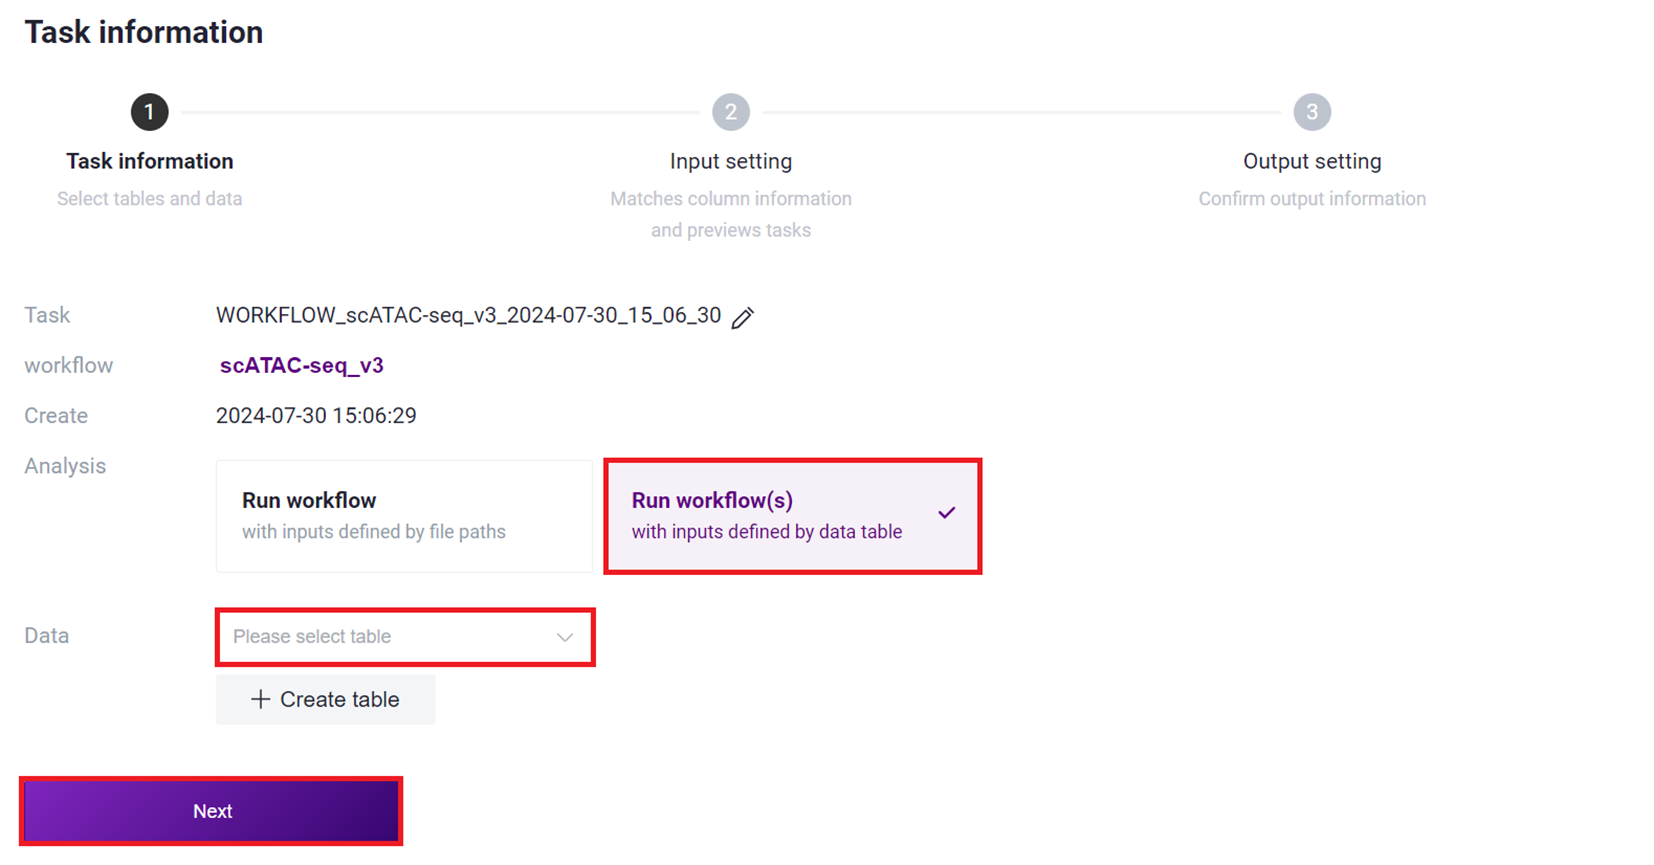
- Select Run workflow(s), click on Please select table, choose the table imported in this section 3), select the required rows, and click [ Next ].
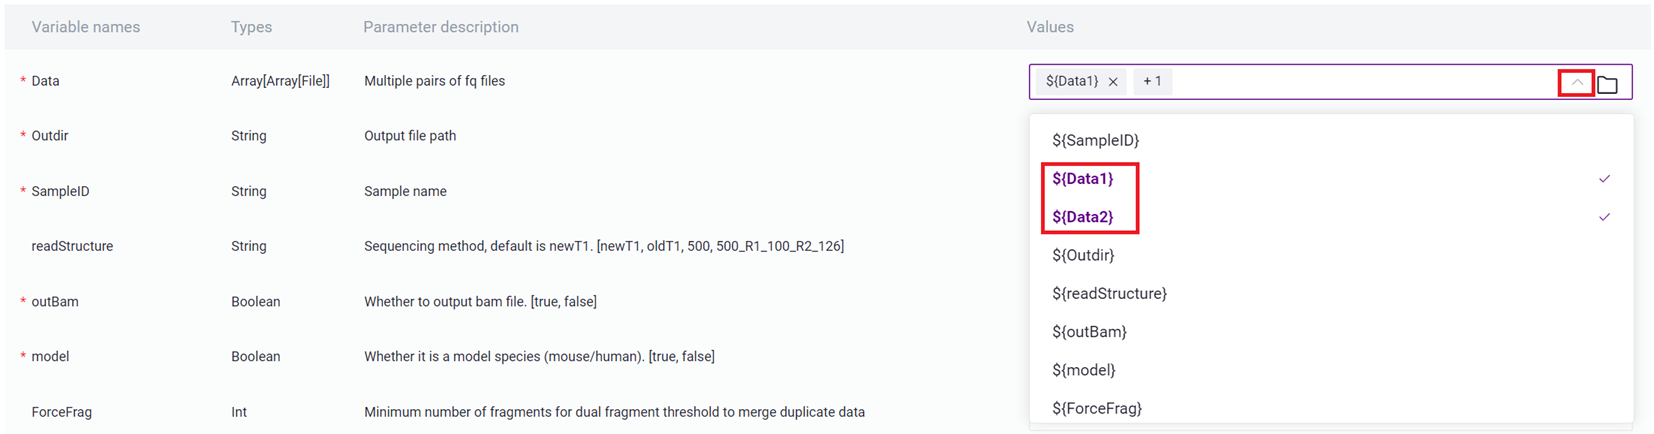
- Click on Values and select the corresponding values, such as Data selecting ${Data1} and ${Data2}, ensuring to select in order.
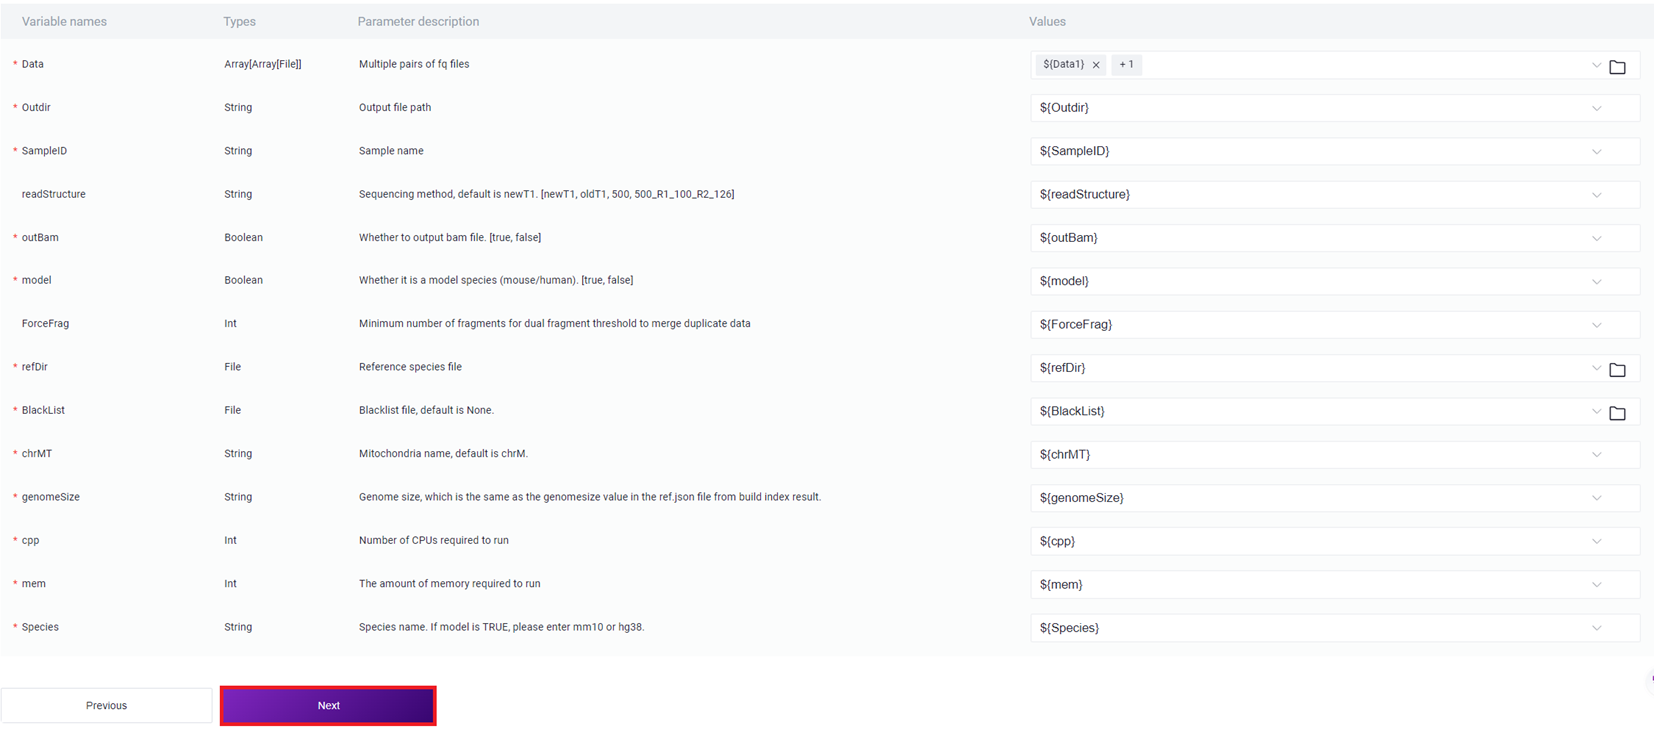
- Enter sample information, and after completion, click [Next], ensuring that the parameter settings are correct.
3.3.5 Step Five: Start Analysis
Click [ Run ] to start analysis.
3.4 View Report and Download Result Files
3.4.1 View Report
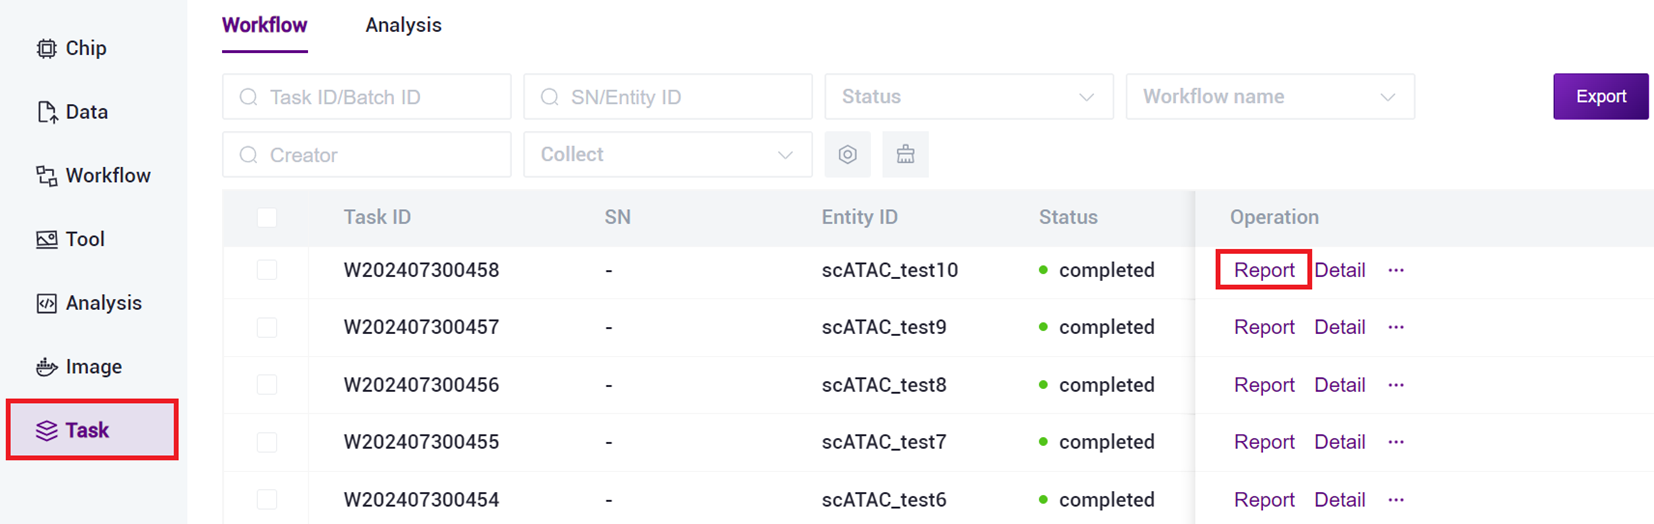
Click on the navigation bar [Task], when the task status shows as completed, it indicates that the task is complete, click [Report] to view the report section.
3.4.2 Download Report
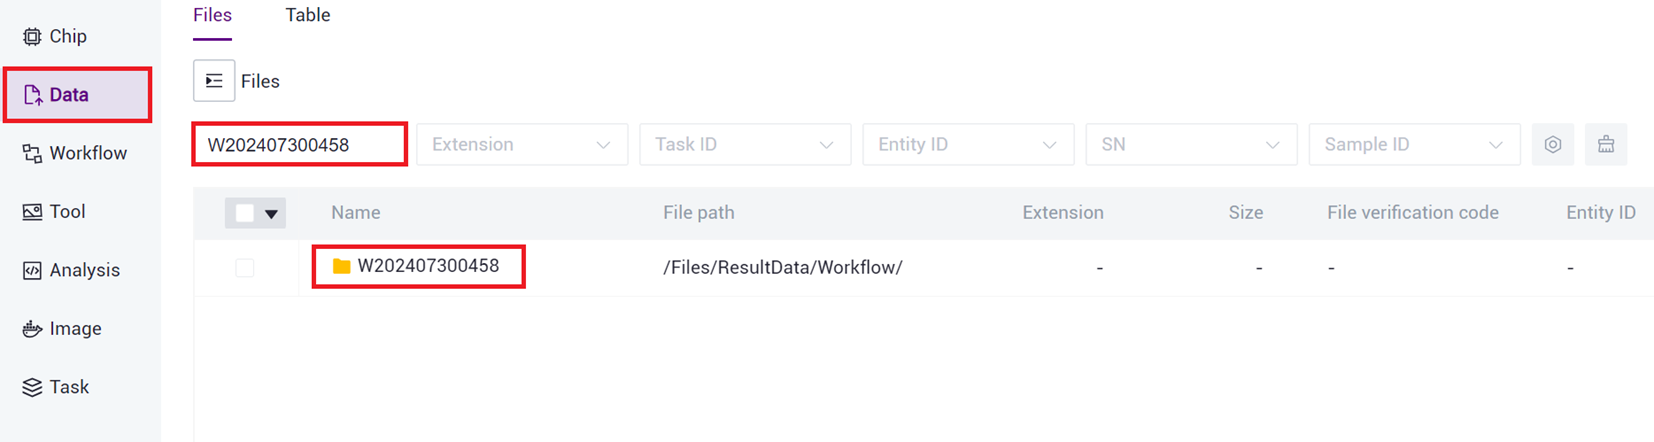
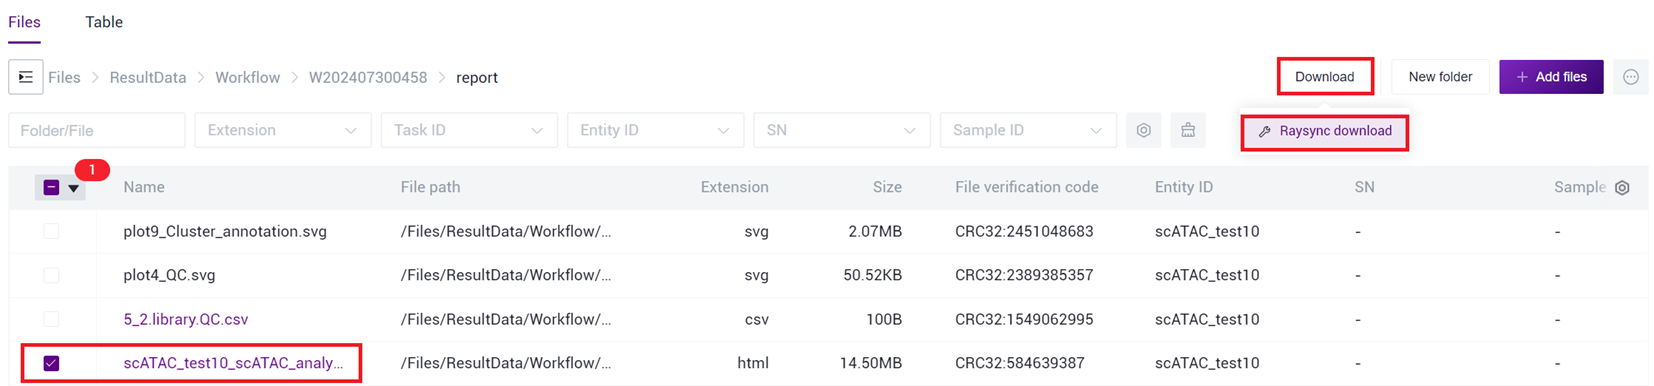
- Click on the navigation bar [Data] to enter the data management page, search based on the task's Task ID, and click to enter the Task ID folder (as shown in Figure 3 -25 ).
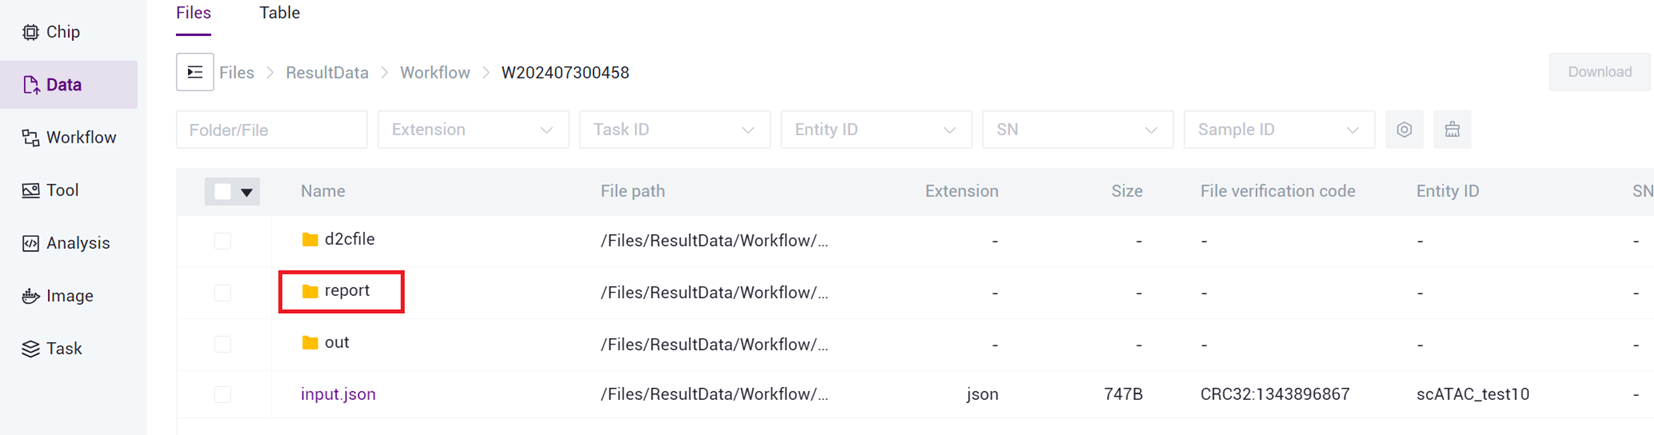
- Click to enter report folder (as shown in Figure 3 -26 ).
- Select the report.html file, click [Download] - [R aysync download ] (as shown in Figure 3 -27 ).
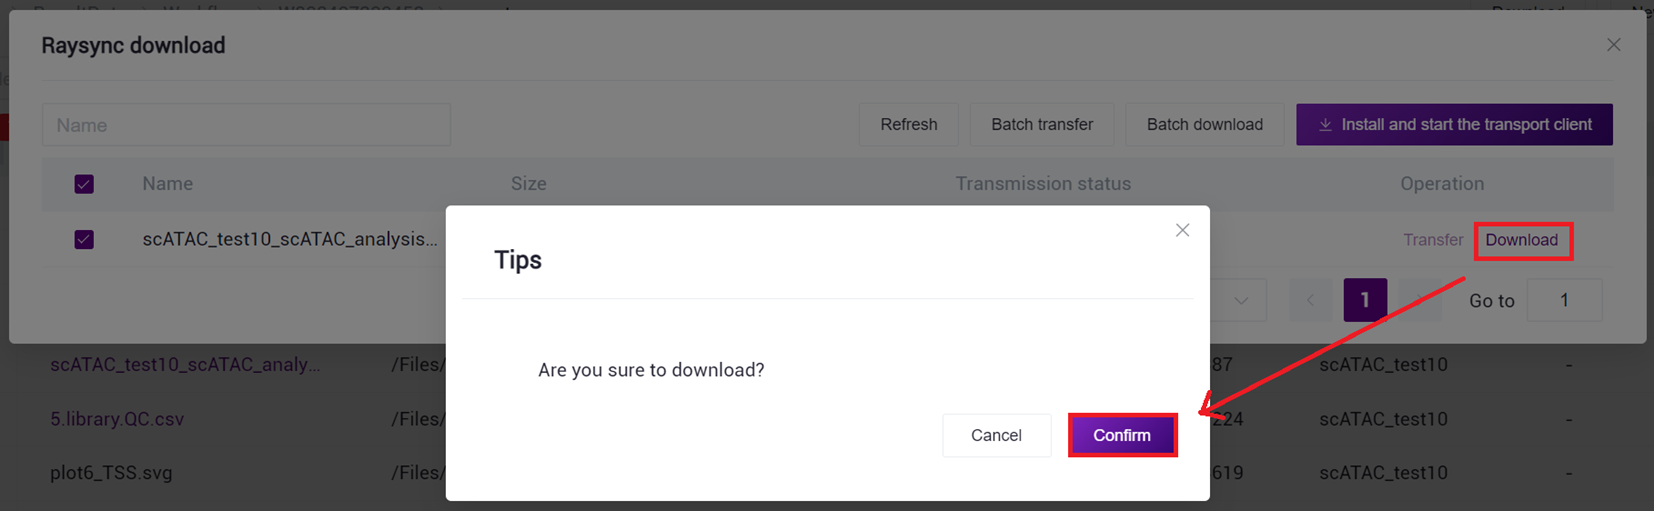
- Click [Transfer]-[Download]-[Confirm], select the target directory and download the report (as shown in Figure 3 -28 ).
4. FAQ
- What are the official single-cell processes and what are the corresponding versions of the kits?
The official maintenance process of scATAC-seq is scATAC-seq_v3, which corresponds to the kit DNBelab C Series High-throughput Single-cell ATAC Library Preparation Set.
- What are the requirements for the gtf file format after the Reference is constructed?
The chromosome name in the gtf file should be the same as the chromosome name in the genome file.